Create company-owned face watchlists and screen incoming verifications against them in your Trust Flows.
An internal blacklist is a company-owned watchlist of face images that you build yourself. During verification, incoming faces are screened against the blacklists you select in your Trust Flow tool settings.Blacklists are company-scoped and private. A blacklist is only ever visible and matchable within the company that created it.
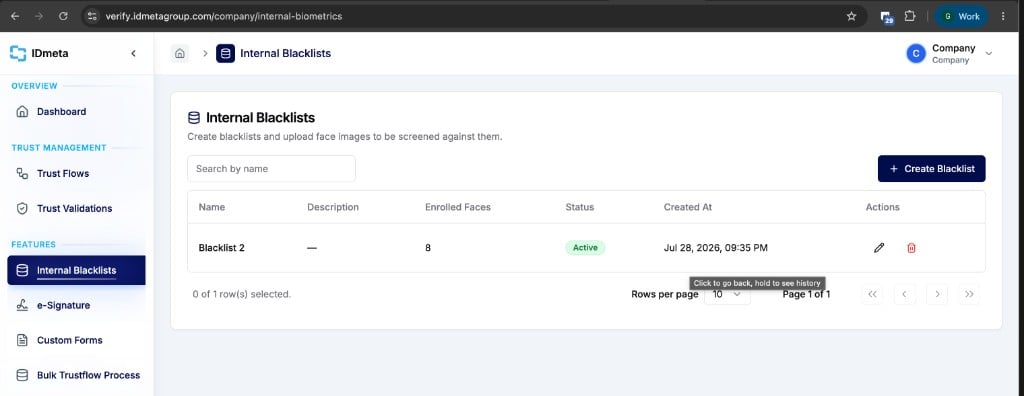
In the dashboard, go to Features → Internal Blacklists (/company/internal-biometrics).
Internal Blacklists list page
2
Create the blacklist
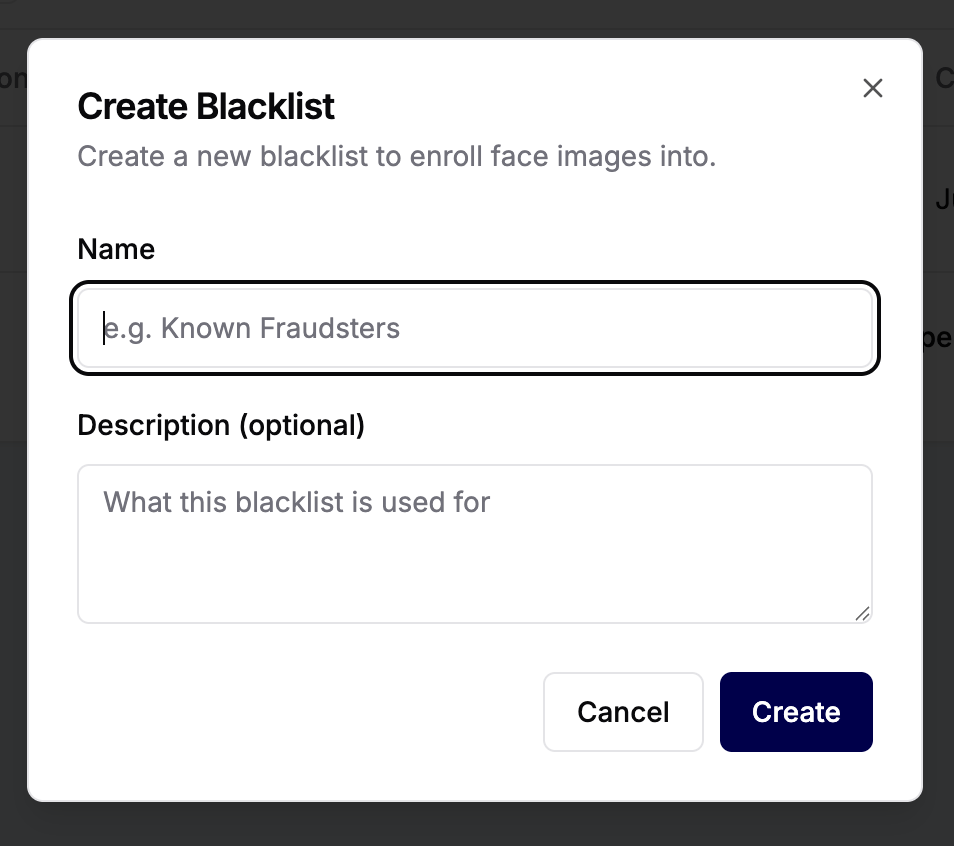
Click + Create Blacklist. Enter a Name (required, unique within your company, max 100 characters) and an optional Description (max 255 characters). Click Create.
Create Blacklist modal
Each blacklist has an Active or Inactive status. Inactive blacklists cannot receive new face uploads and are not screened against.
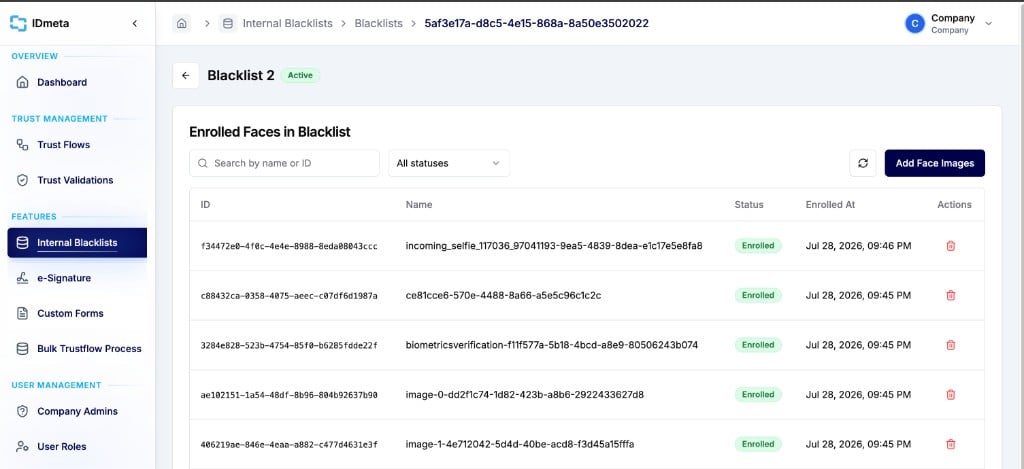
Click a blacklist name in the list to open its detail page. The Enrolled Faces in Blacklist table shows each face’s ID, Name, Status, and Enrolled At timestamp.
Blacklist detail page with enrolled faces
2
Upload face images
Click Add Face Images and select your files.Standard limits (may be configurable per deployment):
Formats: JPG, JPEG, PNG
Up to 50 images per upload
Up to 10 MB per file
Each image should contain one clear, front-facing face
The face Name is taken from the uploaded file’s filename (without extension). Name your files meaningfully — that name appears in match results.
3
Wait for enrollment to finish
Enrollment is asynchronous. The upload is accepted immediately and processed in the background. Faces move from Pending → Enrolled or Failed.Use the refresh button on the Enrolled Faces table to see updated statuses. A large batch takes a short while.A failed face shows the reason returned by the biometric engine (for example, no face detected). Fix the image and re-upload it — failed rows do not block the rest of the batch.A batch can finish as Completed, Partially Completed (some faces failed), or Failed.
Each enrolled face gets its own ID. That same ID appears as Blacklist Face Upload ID on a Trust Validation match, so you can trace a hit back to the exact enrolled image.
Step 3 — Turn on blacklist screening in a Trust Flow
1
Open Biometrics Verification tool settings
Open the Trust Flow that includes Biometrics Verification, then open the product Tool Settings.
2
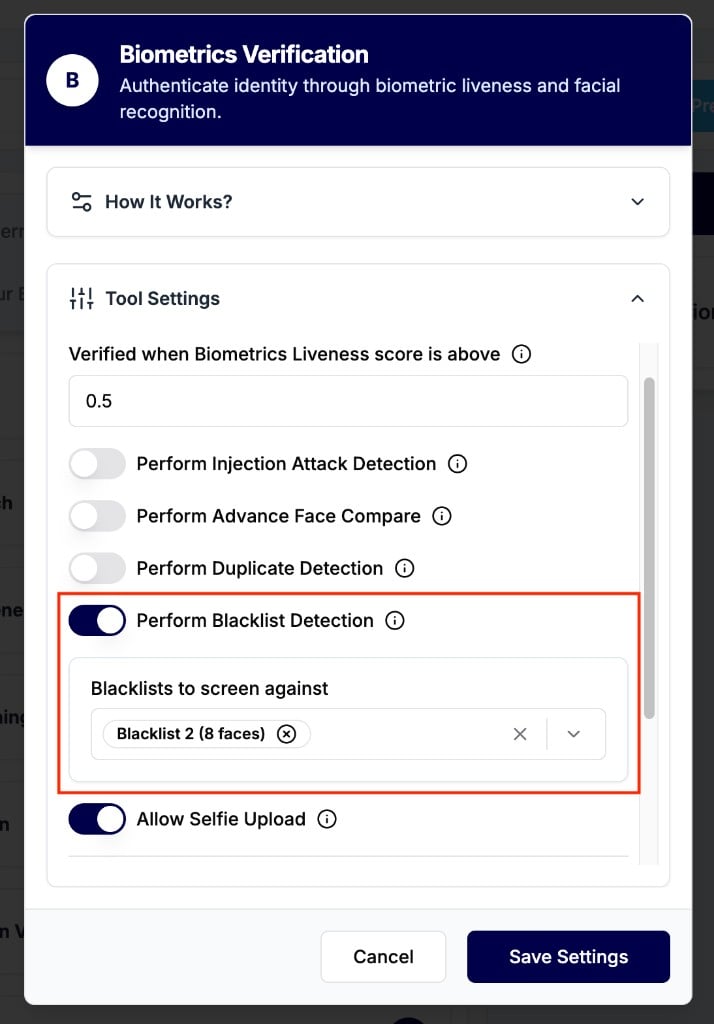
Enable Perform Blacklist Detection
Turn on Perform Blacklist Detection. Under Blacklists to screen against, select one or more blacklists. The picker shows each blacklist’s enrolled face count (for example, Blacklist 2 (8 faces)).Only blacklists owned by your company can be selected.
Biometrics Verification tool settings with blacklist detection enabled
3
Save the Trust Flow
Click Save Settings, then save the Trust Flow as described in Creating a Trust Flow.Screening runs when the verification is finalised. The incoming selfie is compared against every face in the selected blacklists.
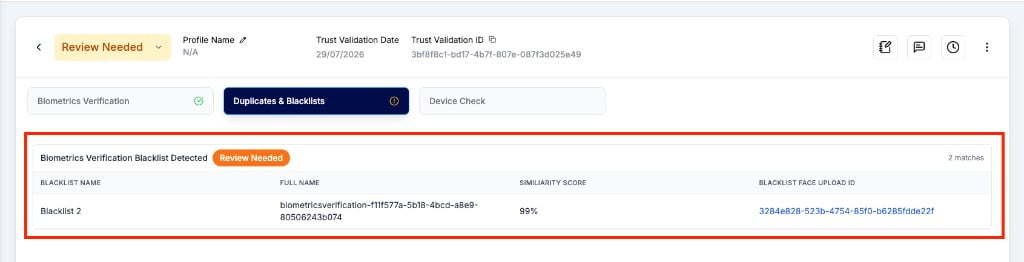
When a match is found, open the Trust Validation detail page and select the Duplicates & Blacklists tab. Matches appear in a Biometrics Verification Blacklist Detected card.
Trust Validation Duplicates and Blacklists tab showing a blacklist match
Each match row shows:
Blacklist Name — which list the face matched
Full Name — the enrolled face’s name (from the filename)
Similarity Score — the engine’s similarity score for that match (for example, 99%)
Blacklist Face Upload ID — links back to the enrolled face
If the same face matches faces in several blacklists, each blacklist is reported separately.By default, a match sets the Trust Validation to Review Needed so a human can adjudicate. The default action is configurable — you can instead Reject the validation automatically. Review Needed is the default. The engine returns a similarity score per match; there is no fixed threshold documented here.
Enroll clear, well-lit, front-facing images. Avoid group photos, heavy occlusion, sunglasses, low resolution, or screenshots of screens.
Enroll two or three images of the same person when you have them. More angles means more reliable matching.
Use filenames that identify the person or case. They become the face’s Name in match results.
Keep separate blacklists for separate purposes (for example, Confirmed Fraud, Chargeback Abuse, Internal Ban). Match results then say why someone was flagged, and you can screen against different lists in different Trust Flows.
Keep lists current. Remove faces that are no longer relevant.
Keep a human in the review loop rather than auto-rejecting, unless your policy explicitly calls for it.
Face images are biometric personal data. Only enroll images you have a lawful basis to store and screen against. Follow your retention policy and applicable privacy law, and keep an internal record of why each person was added.
Poll the batch status, including succeeded and failed counts
Creating, editing, and deleting blacklists is dashboard-only. The API enrolls faces into blacklists that already exist.Authentication follows the same scheme as all other v3 endpoints. See Introduction to the API.
Face enrollment overview
End-to-end flow, status values, and authentication.
List blacklists
GET /api/v3/biometric-blacklists
Upload faces
POST /api/v3/biometric-blacklists/{blacklistId}/faces
Poll upload status
GET /api/v3/biometric-blacklists/uploads/{uploadId}