> ## Documentation Index
> Fetch the complete documentation index at: https://docs.idmetagroup.com/llms.txt
> Use this file to discover all available pages before exploring further.
# Introduction to the API
> Overview of how to integrate IDmeta products and verification types using the IDmeta API.
## Introduction to the API
The IDmeta API enables seamless integration of all products and verification types into your applications, offering global identity verification and business validation capabilities.
## Authentication
To call IDmeta APIs from your application or from tools like Postman, you need an API token associated with your account.
### Getting an API token
1. **Log in** to the IDmeta system (dashboard).
2. **Open your profile**: click your profile avatar/name to go to the profile page.
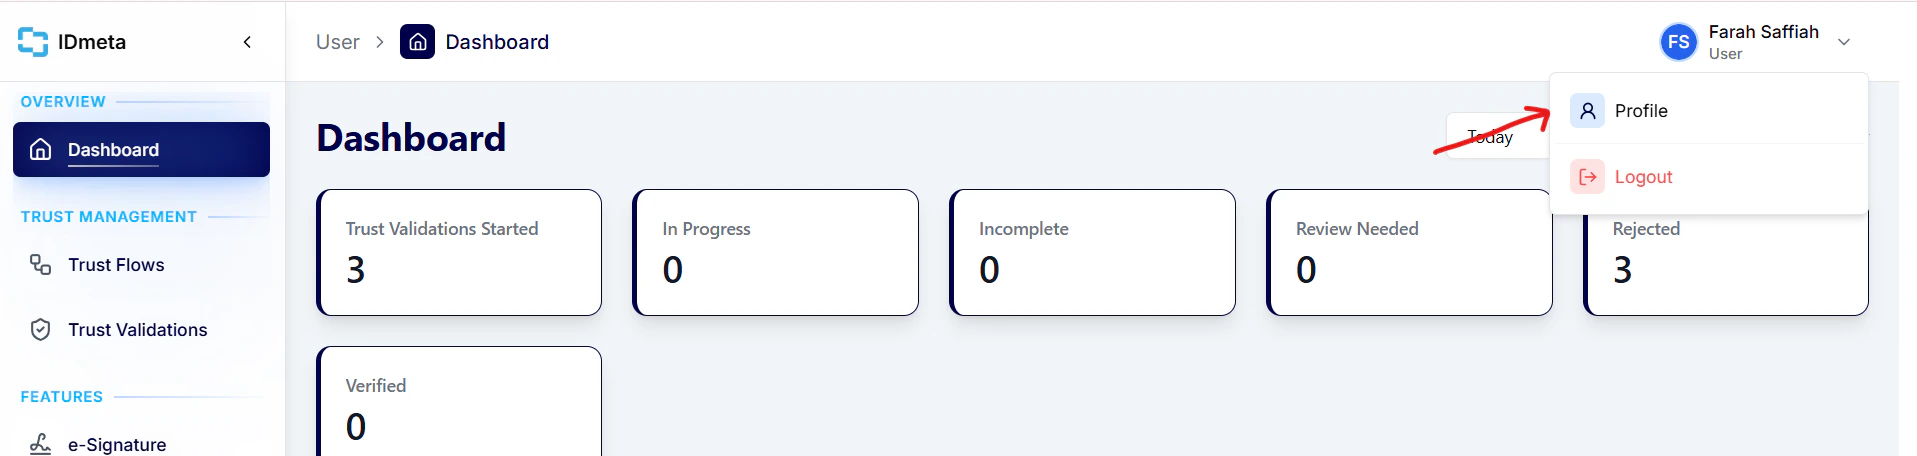 3. In the **Settings** tab, open **API Tokens**.
4. Click **Create token** to generate a new API token.
3. In the **Settings** tab, open **API Tokens**.
4. Click **Create token** to generate a new API token.
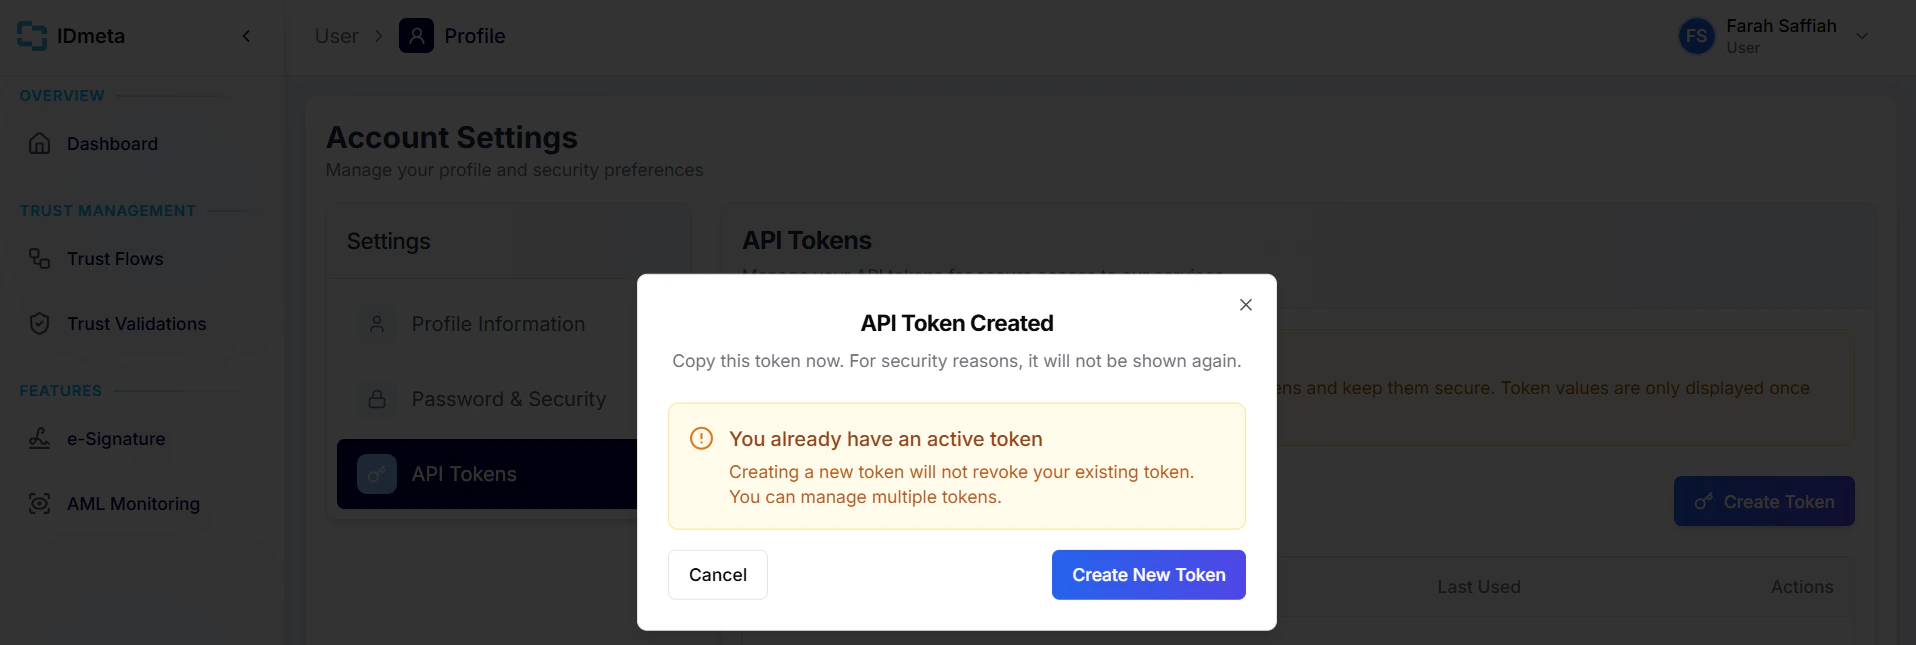 5. Copy the token and store it securely. Treat it like a password.
Use this token as a Bearer token in the `Authorization` header when making requests.
## How to use our API
### Processes
For every verification process, the following steps must be followed:
#### 1. Initiate the verification
Begin by creating a new trust validation using the **Create Trust Validation** API.\
The response will return a `trustValidationId`, which you will use throughout the rest of the process.
#### 2. Perform verification checks
Next, call the relevant verification-type APIs defined in your **Trust Flow (template)**.\
Examples include the **Document Verification** API, **Biometrics Verification** API, and **Watchlist & AML Screening** API.\
At this stage, the verification status will automatically update to **In Progress**.
#### 3. Finalize the verification
Once all required verification checks are completed, call the **Finalize Trust Validation** API.\
This step evaluates the results of all performed verification types and sets the final verification status to one of the following:
* **Verified**
* **Review needed**
* **Rejected**
#### 4. Retrieve trust validation results
To review the full session — including overall status and each verification result — call the **Trust Validation Result** API with your `trustValidationId`. You can use this at any point after create trust validation, whether checks are still in progress or already finalized.
#### 5. Update trust validation status (optional)
To manually update the overall trust validation status, call the **Update Trust Validation Status** API with the `trustValidationId` and the `status` code in the request body. The `status` field is required — use the same code as the outcome you selected during review (for example 3 for Verified, 2 for Review Needed, 1 for Rejected).
#### Extra: Adding metadata
To add metadata that will be sent in your webhook, call the **Metadata** API after the **Create Trust Validation** API and before you finalize the trust validation.
## Data Dictionary
Learn what each verification status means and how to interpret it.
5. Copy the token and store it securely. Treat it like a password.
Use this token as a Bearer token in the `Authorization` header when making requests.
## How to use our API
### Processes
For every verification process, the following steps must be followed:
#### 1. Initiate the verification
Begin by creating a new trust validation using the **Create Trust Validation** API.\
The response will return a `trustValidationId`, which you will use throughout the rest of the process.
#### 2. Perform verification checks
Next, call the relevant verification-type APIs defined in your **Trust Flow (template)**.\
Examples include the **Document Verification** API, **Biometrics Verification** API, and **Watchlist & AML Screening** API.\
At this stage, the verification status will automatically update to **In Progress**.
#### 3. Finalize the verification
Once all required verification checks are completed, call the **Finalize Trust Validation** API.\
This step evaluates the results of all performed verification types and sets the final verification status to one of the following:
* **Verified**
* **Review needed**
* **Rejected**
#### 4. Retrieve trust validation results
To review the full session — including overall status and each verification result — call the **Trust Validation Result** API with your `trustValidationId`. You can use this at any point after create trust validation, whether checks are still in progress or already finalized.
#### 5. Update trust validation status (optional)
To manually update the overall trust validation status, call the **Update Trust Validation Status** API with the `trustValidationId` and the `status` code in the request body. The `status` field is required — use the same code as the outcome you selected during review (for example 3 for Verified, 2 for Review Needed, 1 for Rejected).
#### Extra: Adding metadata
To add metadata that will be sent in your webhook, call the **Metadata** API after the **Create Trust Validation** API and before you finalize the trust validation.
## Data Dictionary
Learn what each verification status means and how to interpret it.