> ## Documentation Index
> Fetch the complete documentation index at: https://docs.idmetagroup.com/llms.txt
> Use this file to discover all available pages before exploring further.
# Introduction to the API (Legacy)
> Overview of how to integrate IDmeta products and verification types using the IDmeta API.
## Introduction to the API
This documentation covers the legacy IDmeta API (v1). For information on the latest API version, please refer to the [current API Reference](/api-reference/introduction).
The legacy API is primarily used by existing Direct Link integrations and returns response payloads and webhook formats that differ from those used in our newer API versions.
Our current API version (v3) introduces a more standardized, structured, and consistent format for API responses and webhook events, making integrations easier to develop, maintain, and scale.
While we will continue to support the legacy API for existing integrations, we strongly recommend that all clients migrate to the v3 API to take advantage of the latest features, improvements, and long-term support.
Explore the full IDmeta API collection, including endpoints for KYC, government data, KYB, and alternative verifications.
## Authentication
To call IDmeta APIs from your application or from tools like Postman, you need an API token associated with your account.
### Getting an API token
1. **Log in** to the IDmeta system (dashboard).
2. **Open your profile**: click your profile avatar/name to go to the profile page.
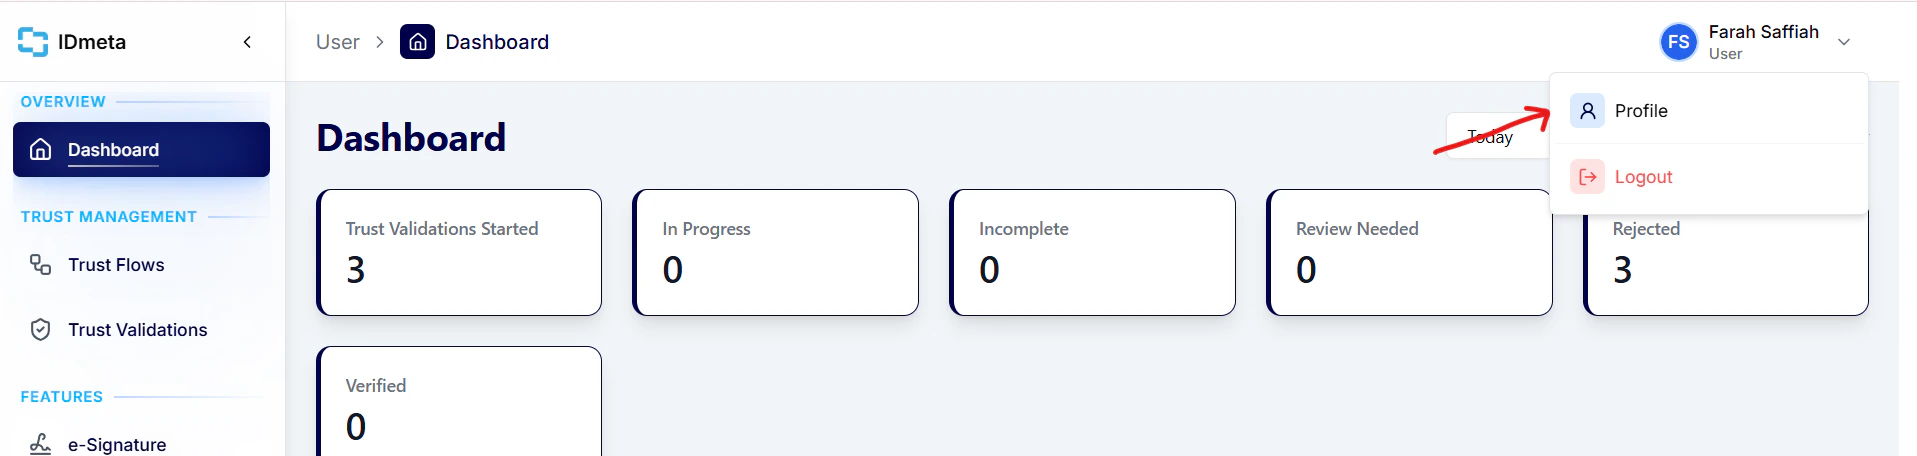 3. In the **Settings** tab, open **API Tokens**.
4. Click **Create token** to generate a new API token.
3. In the **Settings** tab, open **API Tokens**.
4. Click **Create token** to generate a new API token.
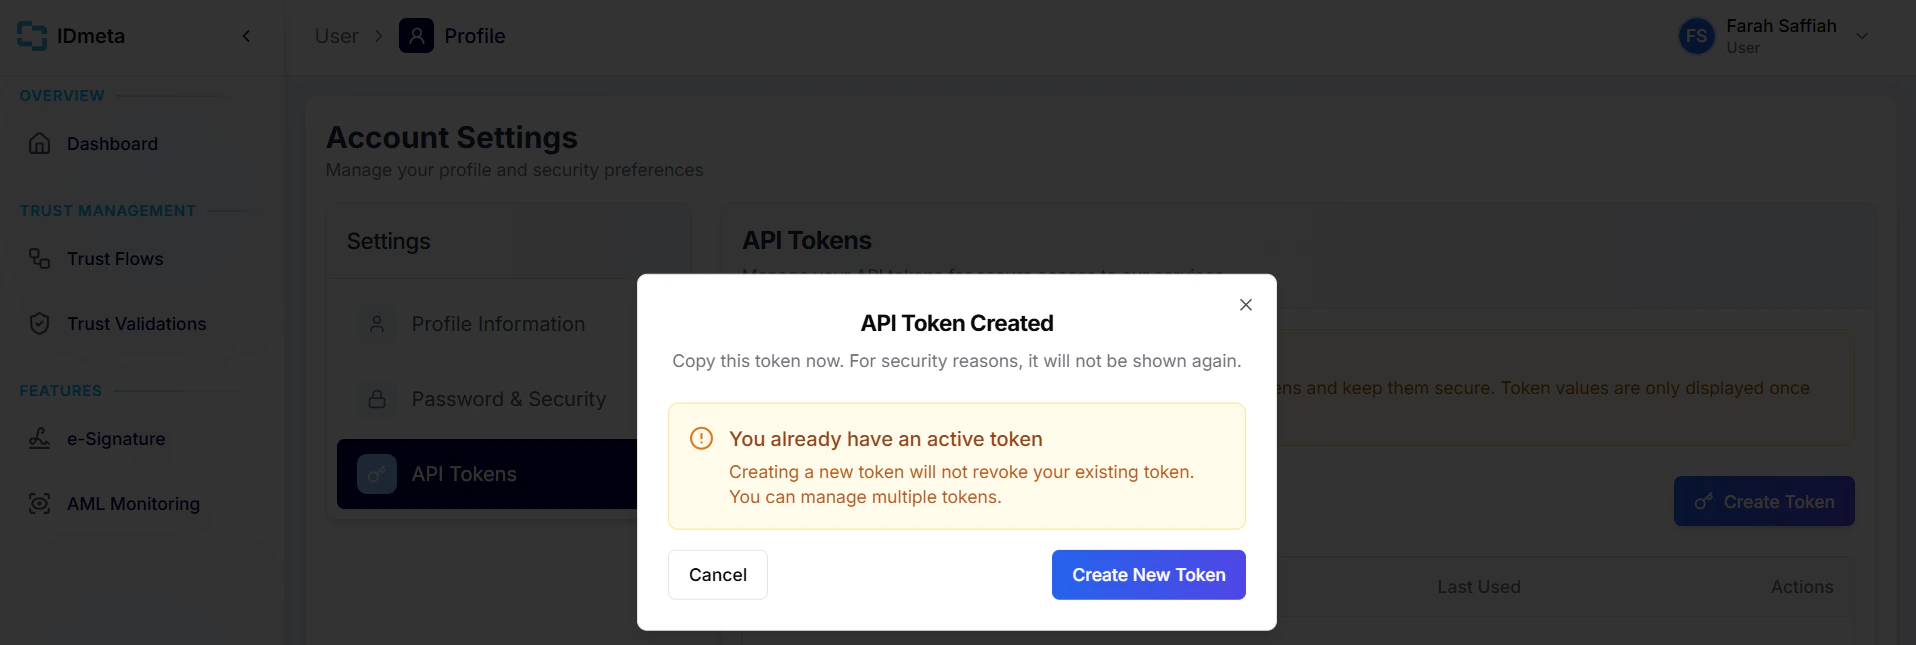 5. Copy the token and store it securely. Treat it like a password.
Use this token as a Bearer token in the `Authorization` header when making requests.
## How to use our API
### Processes
For every verification process, the following steps must be followed:
#### 1. Initiate the verification
Begin by creating a new verification using the **Create Verification** API.\
The response will return a `verificationId`, which you will use throughout the rest of the process.
#### 2. Perform verification checks
Next, call the relevant verification-type APIs defined in your **Trust Flow (template)**.\
Examples include the **Document Verification** API, **Biometrics Verification** API, and **Watchlist & AML Screening** API.\
At this stage, the verification status will automatically update to **In Progress**.
#### 3. Finalize the verification
Once all required verification checks are completed, call the **Finalize Verification** API.\
This step evaluates the results of all performed verification types and sets the final verification status to one of the following:
* **Verified**
* **Review needed**
* **Rejected**
#### Extra: Adding metadata
To add metadata that will be sent in your webhook, call the **Metadata** API after the **Create Verification** API and before you finalize the verification.
## Data Dictionary
Learn what each verification status means and how to interpret it.
5. Copy the token and store it securely. Treat it like a password.
Use this token as a Bearer token in the `Authorization` header when making requests.
## How to use our API
### Processes
For every verification process, the following steps must be followed:
#### 1. Initiate the verification
Begin by creating a new verification using the **Create Verification** API.\
The response will return a `verificationId`, which you will use throughout the rest of the process.
#### 2. Perform verification checks
Next, call the relevant verification-type APIs defined in your **Trust Flow (template)**.\
Examples include the **Document Verification** API, **Biometrics Verification** API, and **Watchlist & AML Screening** API.\
At this stage, the verification status will automatically update to **In Progress**.
#### 3. Finalize the verification
Once all required verification checks are completed, call the **Finalize Verification** API.\
This step evaluates the results of all performed verification types and sets the final verification status to one of the following:
* **Verified**
* **Review needed**
* **Rejected**
#### Extra: Adding metadata
To add metadata that will be sent in your webhook, call the **Metadata** API after the **Create Verification** API and before you finalize the verification.
## Data Dictionary
Learn what each verification status means and how to interpret it.